Introduction
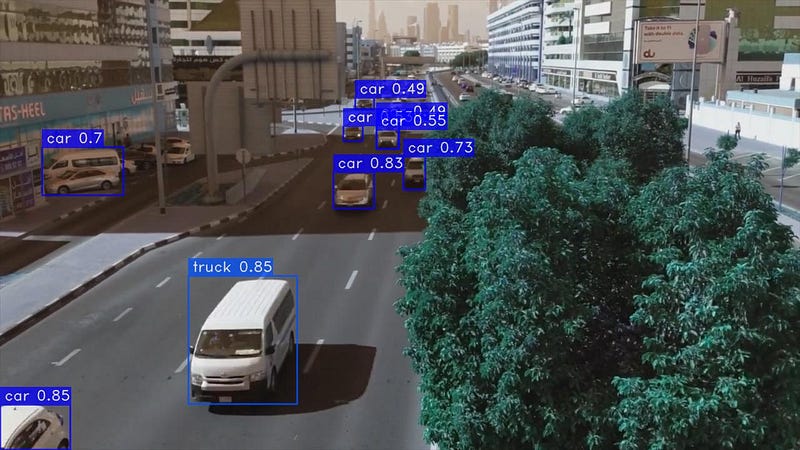
In the field of computer vision, object detection is a fundamental technology that enables machines to perceive and interpret the visual environment with exceptional accuracy. This advanced technique empowers computers not only to identify objects within images or videos, but also to localize them by drawing bounding boxes around them. Object detection has transformed numerous industries, from self-driving cars to surveillance systems, and is constantly advancing the frontiers of artificial intelligence.
The core concept of object detection resides in its capacity to efficiently merge two essential tasks: object localization and object classification. The process of object localization entails determining the precise position of an object within an image or video frame, usually by means of bounding boxes or masks.
What are YOLO and YOLO-NAS?
YOLO (You Only Look Once) comprises a range of algorithms developed by Joseph Redmon, et al. for real-time object detection. It is widely used owing to its high speed and accuracy for detecting objects. YOLO algorithms detect objects in a single stage, thereby making them much faster than two-stage detectors that need to examine an image twice. Nevertheless, YOLO algorithms usually exhibit less accuracy compared to the two-stage detectors.
YOLO-NAS is a cutting-edge object detection model created by Deci AI. It’s founded on the YOLOv5 framework and implements Neural Architecture Search (NAS) to determine the optimal model architecture for any task. YOLO-NAS surpasses YOLOv5 in terms of accuracy and speed, and it’s more efficient,which enables it to operate on lower-powered devices.
How to use YOLO for images and videos
Step 1: Installing the necessary libraries
pip install opencv-python ultralytics
Step 2: Importing libraries
import cv2
from ultralytics import YOLO
Step 3: Choose your model
model = YOLO("yolov8n.pt")On this website, you can compare different models and weigh up their respective advantages and disadvantages. In this case we have chosen yolov8n.pt.
Step 4: Write a function to predict and detect objects in images and videos
def predict(chosen_model, img, classes=[], conf=0.5):
    if classes:
        results = chosen_model.predict(img, classes=classes, conf=conf)
    else:
        results = chosen_model.predict(img, conf=conf)

    return results


def predict_and_detect(chosen_model, img, classes=[], conf=0.5):
    results = predict(chosen_model, img, classes, conf=conf)

    for result in results:
        for box in result.boxes:
            cv2.rectangle(img, (int(box.xyxy[0][0]), int(box.xyxy[0][1])),
                          (int(box.xyxy[0][2]), int(box.xyxy[0][3])), (255, 0, 0), 2)
            cv2.putText(img, f"{result.names[int(box.cls[0])]}",
                        (int(box.xyxy[0][0]), int(box.xyxy[0][1]) - 10),
                        cv2.FONT_HERSHEY_PLAIN, 1, (255, 0, 0), 1)
    return img, results
predict() function
This function takes three arguments:
chosen_model: The trained model to use for predictionimg: The image to make a prediction onclasses: (Optional) A list of class names to filter predictions toconf: (Optional) The minimum confidence threshold for a prediction to be considered
The function first checks if the classes argument is provided. If it is, then the chosen_model.predict() method is called with the classes argument, which filters the predictions to only those classes. Otherwise, the chosen_model.predict() method is called without the classes argument, which returns all predictions.
The conf argument is used to filter out predictions with a confidence score lower than the specified threshold. This is useful for removing false positives.
The function returns a list of prediction results, where each result contains the following information:
name: The name of the predicted classconf: The confidence score of the predictionbox: The bounding box of the predicted object
predict_and_detect() function
This function takes the same arguments as the predict() function, but it also returns the annotated image in addition to the prediction results.
The function first calls the predict() function to get the prediction results. Then, it iterates over the prediction results and draws a bounding box around each predicted object. The name of the predicted class is also written above the bounding box.
The function returns a tuple containing the annotated image and the prediction results.
Here is a summary of the differences between the two functions:
- The
predict()function only returns the prediction results, while thepredict_and_detect()function also returns the annotated image. - The
predict_and_detect()function is a wrapper around thepredict()function, which means that it calls thepredict()function internally.
Step 5: Detecting Objects in Images with YOLOv8
# read the image
image = cv2.imread("YourImagePath")

result_img = predict_and_detect(model, image, classes=[], conf=0.5)
If you want to detect specific classes, which you can find here, simply write the ID number of the object in the list of classes.
Step 6: Save and Plot the result Image
cv2.imshow("Image", result_img)
cv2.imwrite("YourSavePath", result_img)
cv2.waitKey(0)
Step 7: Detecting Objects in Videos with YOLOv8
video_path = r"YourVideoPath"

cap = cv2.VideoCapture(video_path)

while True:

    success, img = cap.read()

    if not success:
        break

    result_img, _ = predict_and_detect(model, img, classes=[], conf=0.5)

    cv2.imshow("Image", result_img)

    cv2.waitKey(1)
Step 8: Save the result Video
# defining function for creating a writer (for mp4 videos)

def create_video_writer(video_cap, output_filename):
    # grab the width, height, and fps of the frames in the video stream.
    frame_width = int(video_cap.get(cv2.CAP_PROP_FRAME_WIDTH))
    frame_height = int(video_cap.get(cv2.CAP_PROP_FRAME_HEIGHT))
    fps = int(video_cap.get(cv2.CAP_PROP_FPS))

    # initialize the FourCC and a video writer object
    fourcc = cv2.VideoWriter_fourcc(*'MP4V')
    writer = cv2.VideoWriter(output_filename, fourcc, fps,
                             (frame_width, frame_height))

    return writer
Just use the function and code above
output_filename = "YourFilename"
writer = create_video_writer(cap, output_filename)

video_path = r"YourVideoPath"

cap = cv2.VideoCapture(video_path)

while True:

    success, img = cap.read()

    if not success:
        break

    result_img, _ = predict_and_detect(model, img, classes=[], conf=0.5)
    writer.write(result_img)
    cv2.imshow("Image", result_img)

    cv2.waitKey(1)

writer.release()
How to use YOLO-NAS for images and videos
Step 1: Installing the necessary libraries
pip install opencv-python torch super-gradients
Step 2: Importing libraries
from super_gradients.training import models
import cv2
import torch
Step 3: Choose your model
device = 'cuda' if torch.cuda.is_available() else "cpu"

model = models.get("yolo_nas_l", pretrained_weights="coco")
On this website, you can compare different models and weigh up their respective advantages and disadvantages. In this case we have chosen yolo_nas_l.
Step 4: Detecting Objects in Images with YOLO-NAS
img_path = r"YourImagePath"
model.predict(img_path, conf=0.25).show()
Step 5: Detecting Objects in Videos with YOLO-NAS
input_video_path = "YourInputVideoPath"
output_video_path = "YourOutputVideoPath"

model.to(device).predict(input_video_path).save(output_video_path)
Conclusion
In this tutorial we have learned how to detect objects with YOLOv8 and YOLO-NAS in images and videos. If you found this code helpful, please clap your hands and comment on this post! I would also love for you to follow me to learn more about Data Science and other related topics. Thanks for reading!