Welcome to the Sega Saturn style Left Joy-Con D-pad mod guide.
No soldering required!
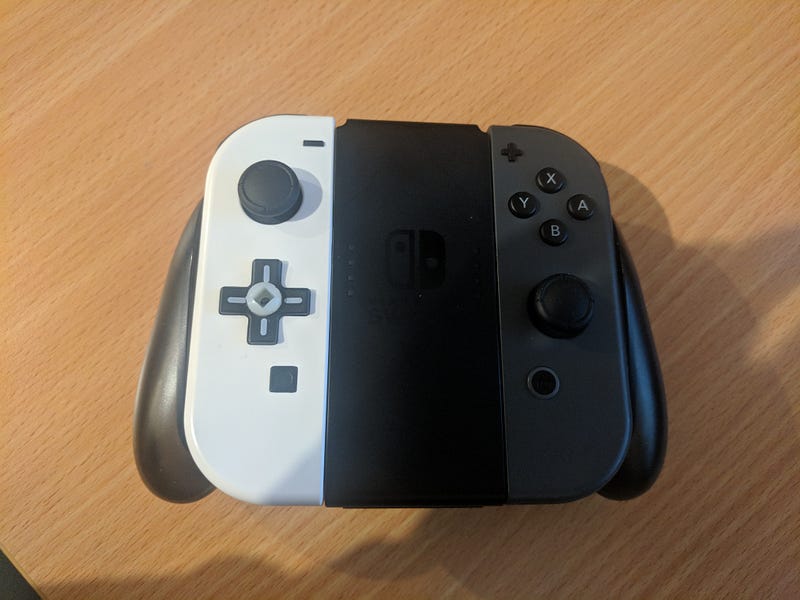
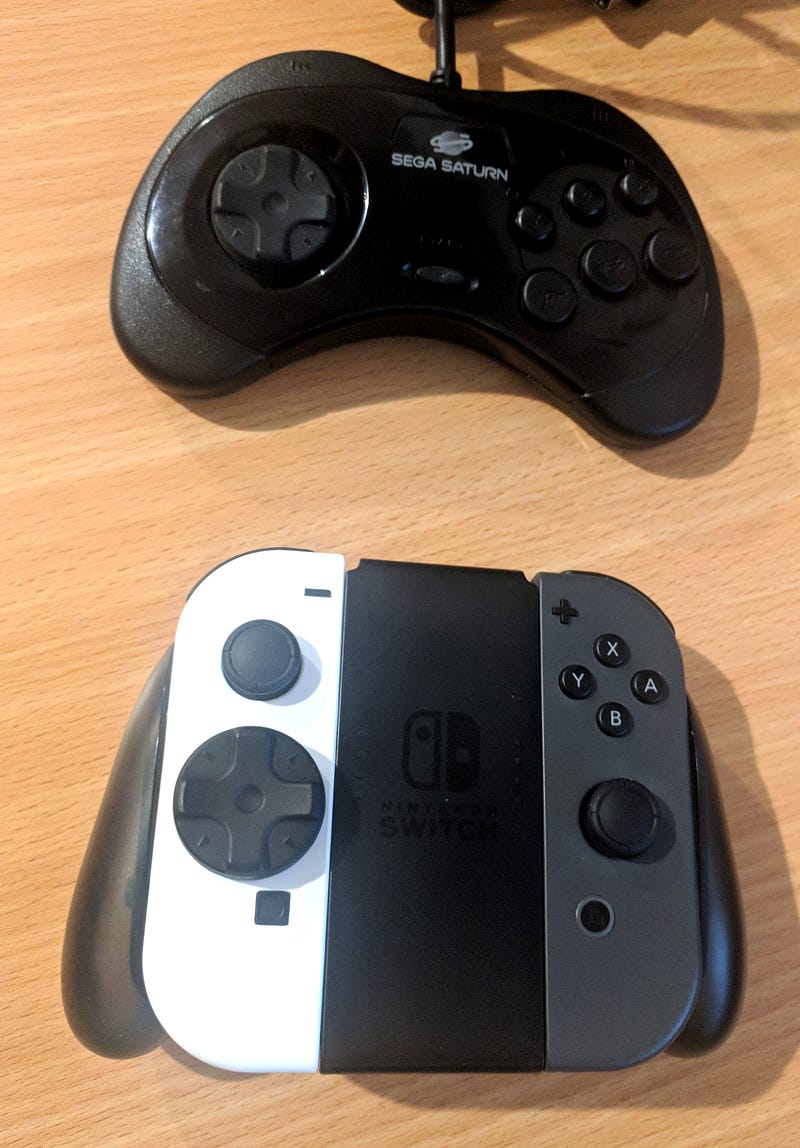
 Nintendo Switch Left Joy-Con with Sega Saturn-style real D-pad
This guide will help you to build your own Nintendo Switch Joy-Con with a Sega Saturn directional controller, step-by-step. Unlike the official Nintendo Switch pro controller, it’s compatible with grip, portable (hand-held) and docked modes.
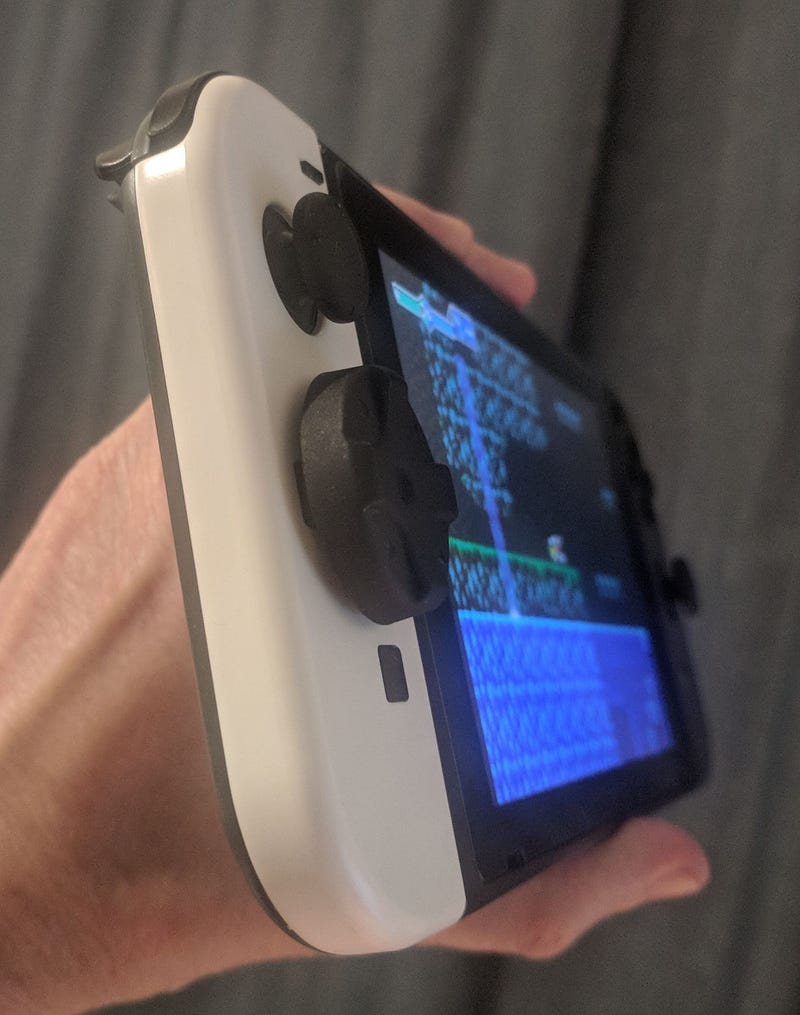
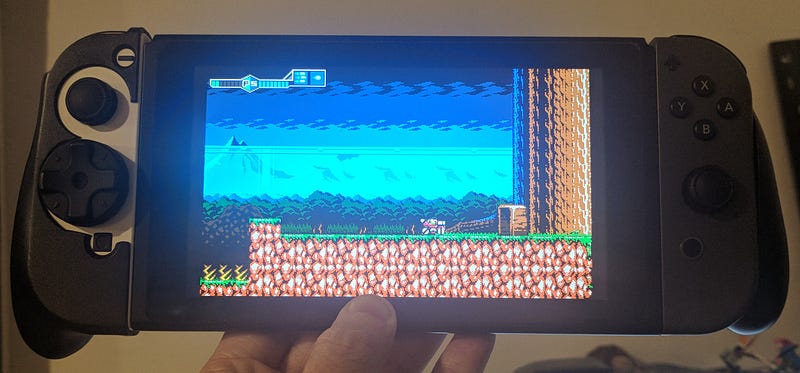
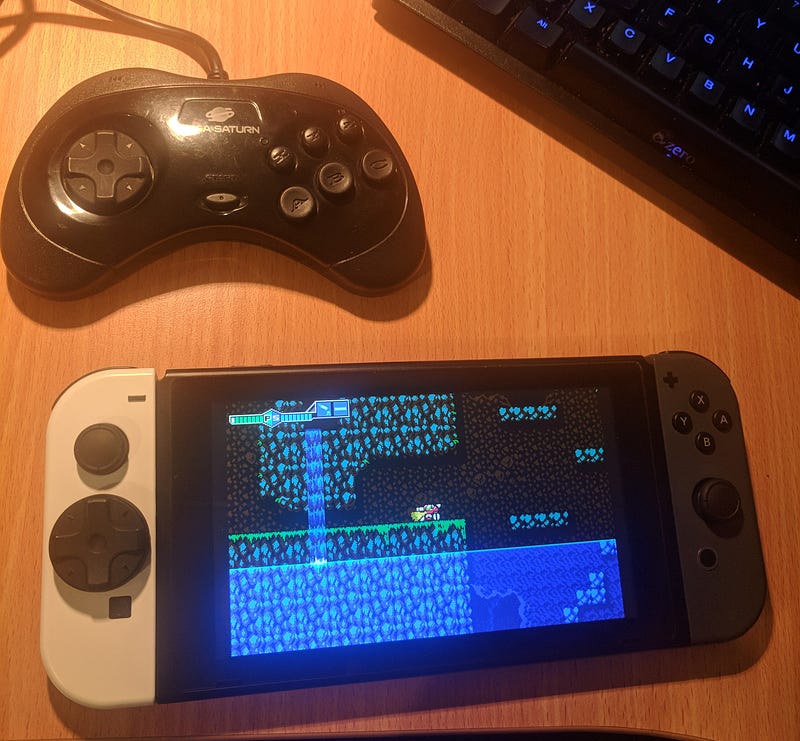 Joy-Con D-pad in handheld portable mode
You may also recognise the D-pad from Sega Genesis / Megadrive 6-button controllers.
Very little electronics knowledge is needed for this project. The hardest part is the fiddly size of everything inside the Joy-Con. You need to plug in and out some really super-tiny plugs inside there, etc. So, set aside a good few hours to patiently proceed, but this guide contains many tips to make it as painless as possible.
Motivation
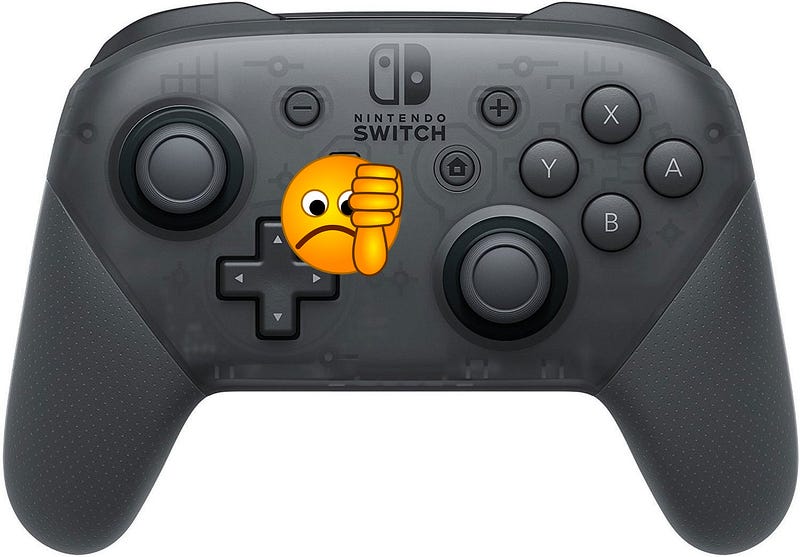
I found the Switch pro gamepad disappointing for a couple of reasons. It has a D-pad, but it’s a + pad, which I find quite limiting. Additionally, it’s not compatible with handheld mode for on-the-go play.
The Sega Saturn D-pad is objectively the best D-pad ever created by humankind (no bias whatsoever ;). It’s circular, so it has all 8 directions on it, and you don’t have to fat-thumb two buttons to push a diagonal. The vertical and horizontal directions are suitably pronounced so there’s no chance of accidental diagonals. The material is textured to provide a low-friction experience, so it’s easy to glide your thumb around it and achieve movements like those possible with arcade joysticks when controlling fighting games.
My performance in precise platforming and my consistency executing fighting game moves have both improved markedly on the Switch since I made this Joy-Con. This is worth the effort!
Check out this video for a closer look at the mechanical performance:
The only caveat is that the D-pad is located lower down on the Joy-Con than the analog stick. This is fine when you’re using a grip, but in portable mode, I sometimes find myself wishing I could grip the device slightly lower down. To that end, I’m probably going to grab some kind of Joy-Con grip which is compatible with portable mode, such as this. Bear in mind that I haven’t tested this grip — it’s just one I’m considering.
Theory / overview
Skip to “What you’ll need” if you‘re a dive-right-in type
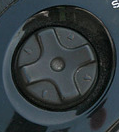
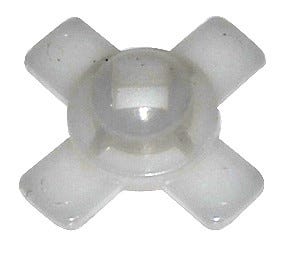
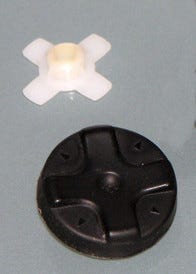
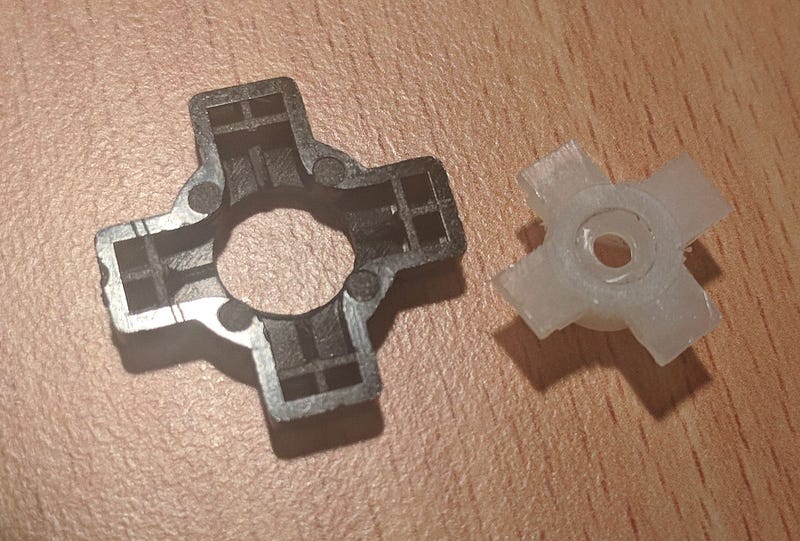
It’s possible to pull out the D-pad from a Saturn controller, and this is what you’ll see:
You’re seeing the shaft of the white nylon actuator which needs two things to work:
- It needs a hole in the controller housing big enough to expose the shaft, but small enough to hold the actuator firmly in.
- The cross part at the base of the actuator needs an internal space just right to hold it snugly against the switches (buttons) on the circuit board (so it doesn’t rattle about and it depresses the switches consistently when you press the D-pad).
The original left Joy-Con front housing has holes in all the wrong places for (1), and has a slightly thicker gap between the housing and the switches than the Saturn gamepad, so it fails (2).
Then consider the BASSTOP DIY D-pad Joy-Con mod. The cut-out in the BASSTOP housing is nearly the right shape for the Saturn actuator, but not quite, and the internal space is still too thick. But, what if we could trade the cross part of the Saturn actuator for the BASSTOP cross pad? The cut-out on the BASSTOP front housing is made for holding it in-place, and the thickness of the BASSTOP cross pad underside is, of course, designed to fit snugly against the Joy-Con switches. That’s requirement (1) and (2) met!
That just leaves the HOW of creating this hybrid Saturn-BASSTOP actuator. Read on.
What you’ll need
A Spare Left Joy-Con
You wouldn’t want to do this with your only left Joy-Con, because some games use the 4 buttons on the left pad as actual buttons, for example Breath Of The Wild and multiplayer games when you use the individual Joy-Con as a whole controller.
You might want to get one of the new colours, since these were presumably manufactured later, and so are less likely to be one of the early units which have the bluetooth de-syncing flaw.
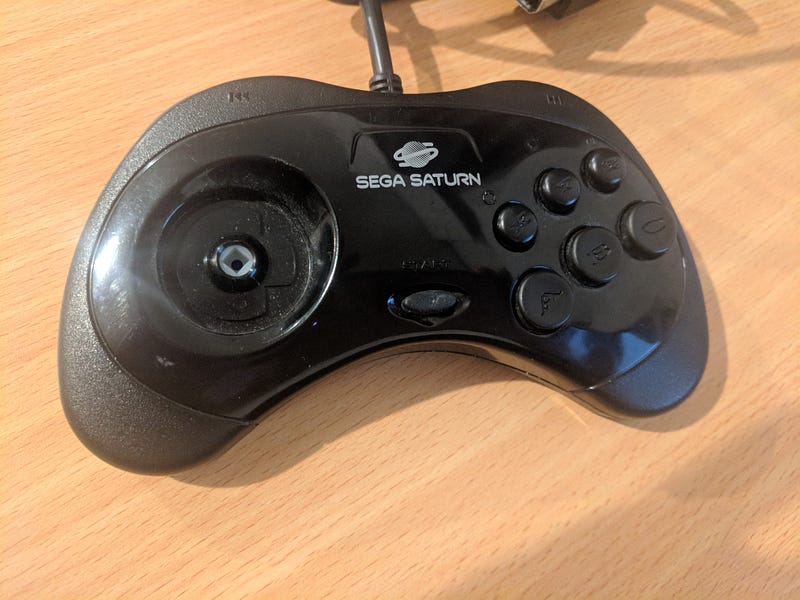
A Sega Saturn Controller or D-pad replacement
I highly recommend an authentic Sega-manufactured controller. It’s not too hard to find them around on eBay/Amazon (although it’s getting harder).
I tried buying one ‘retro’ knock-off with a USB connection, but it’s trash. The D-pad was cheap, slick plastic moulding (unlike the textured plastic of the original). It even had a slightly different size D-pad. That was Retro Power brand. If you decide to try another brand and you find a good one, please let me know in the comments.
It’s easy to tell an original controller since they have weird plugs (not USB).
There are also some products around offering “replacement” d-pads for fixing up Saturn gamepads. They look pretty good, but I haven’t tried them myself. This could be a good/cheaper option since you only want the d-pad, but just make sure it comes with the white nylon “cross” actuator in addition to the black D-pad piece.
A BASSTOP DIY Replacement Joy-Con Shell Case
https://smile.amazon.com/gp/product/B076SN9G5Y
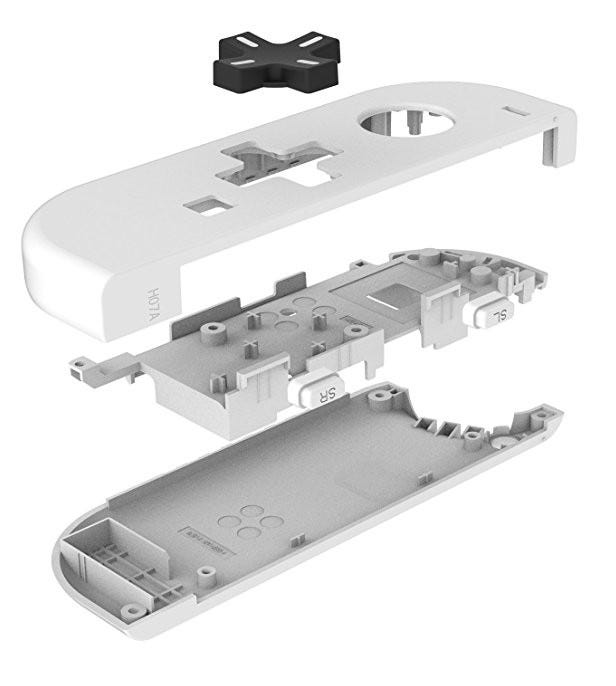
The link is a white one, but you might be able to find other colours if you shop around.
Tools
- Hooked forceps (tweezers)
- A lamp
- Superglue (don’t let this put you off — it’s not structural and this mod is rugged)
- Razor blade / very sharp pen knife
- A vice or clamp
- Some cloth
- Masking tape
- A drill
- A variety of drill bits ranging roughly 3 mm to 9 mm in diameter
- Needle-nosed pliers
- Nail file
- Phillips 00 screwdriver
- Y00 screwdriver (tri-point)
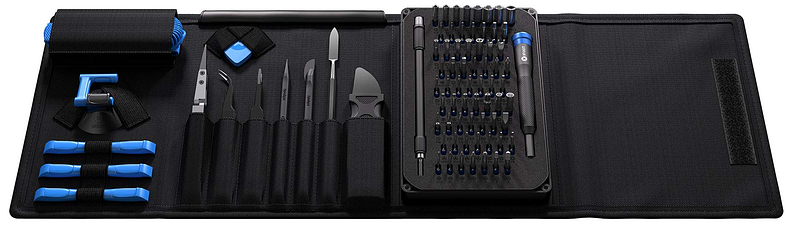
Here are some kits which have the right screwdriver types:
IFIXIT Pro Tech Toolkit IFIXIT 64 Bit Driver Kit Pro’sKit SD-9326M Consumer Electronic Equipment Repair Kit
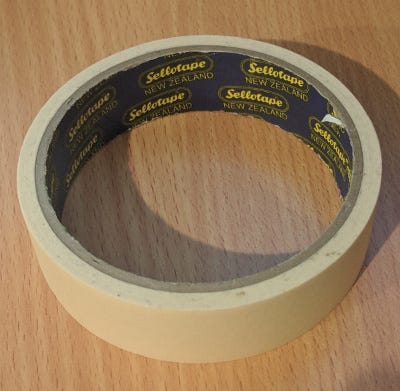 Masking tape, about 2 cm wide
How to
1) Charge your Joy-Con
I freaked out briefly after I reassembled my Joy-Con because it wouldn’t sync. It was just out of batteries. Avoid the frustration of having to wait to test it by charging it ahead of time.
2) Disassemble the Sega Saturn Gamepad
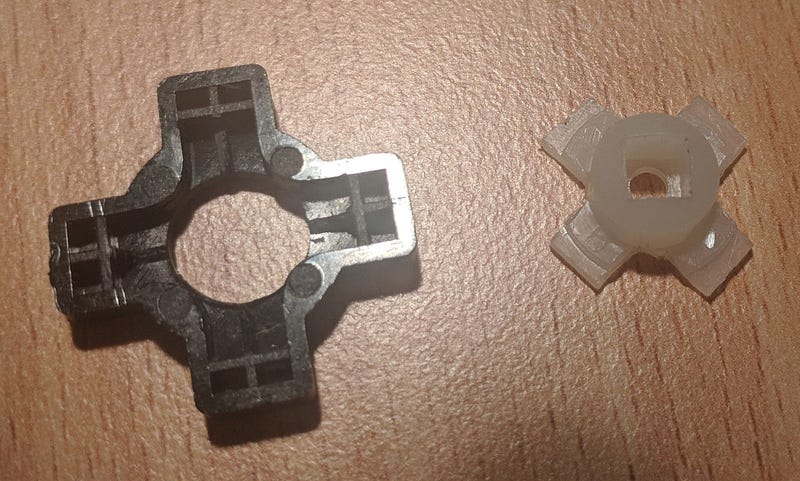
From the Saturn gamepad, you need the D-pad, and the white + shaped actuator which is stuck underneath it. They just pull apart.
 There are the parts you want
Unscrew the Saturn Gamepad and take out the D-pad and the white plus actuator. This is really easy. Once you have the top shell of the gamepad separated from the rest of it, you’ll be able to see the white actuator attached to the underside of the D-pad.
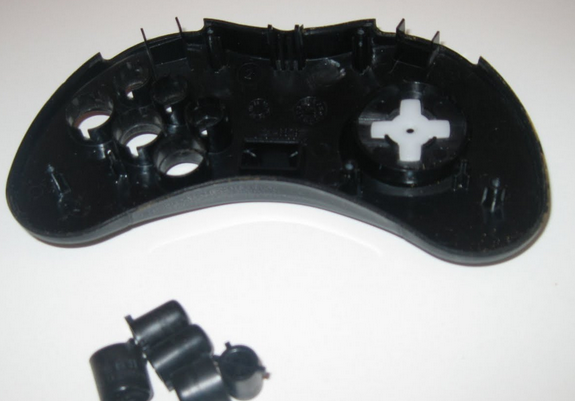
Just put a butter knife or flat-head screwdriver in between the actuator the controller shell to lever the D-pad and the actuator apart.
3) Disassemble the Left Joy-Con
Here you’ll want to make cautious use of the video referred to in the paperwork which comes with the BASSTOP replacement shell. It’s helpful, but there as some ‘gotcha’s to be aware of.
First of all, according to Nintendo, this might void your warranty. They may still be legally obligated to honour the warranty regardless, depending on where you live, but it’s risky anyway. I take no responsibility if your Joy-Con has problems after attempting this project. Proceed at your own risk.
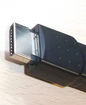
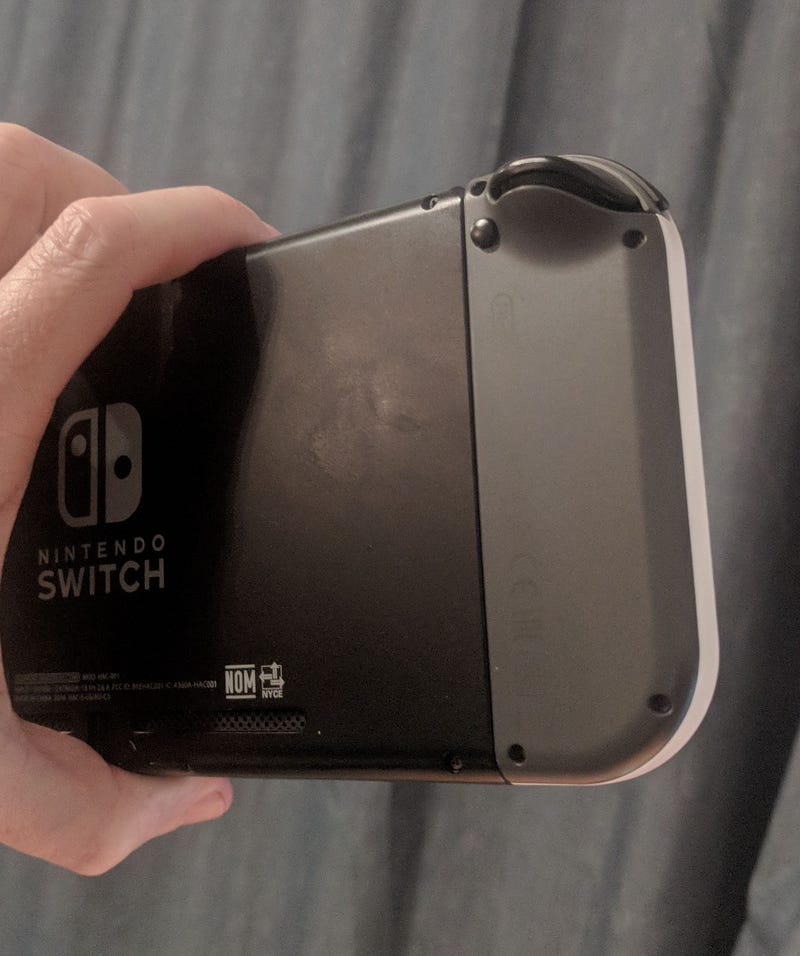
Do NOT pull on the battery wires to disconnect the battery from the circuit board as shown in the video. People have reported this ripping the wires loose. The reality is, there’s no need to disconnect the battery at all, as long as you carefully ensure the battery is supported and not tugged on while you work. In fact, I got by with only unplugging the inner panel (which the ZL is attached to). All the rest can stay connected as long as you don’t mind them getting in the way a little bit while you work.
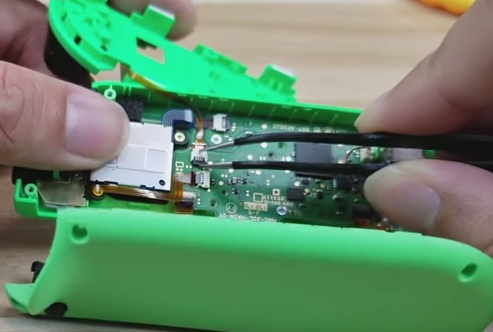 The only plug I unplugged
That said, I only replaced the front plastic piece (you can see my Joy-Con is multi-coloured).
I made the choice that I wanted to disturb the internals as little as possible, and keep as many Nintendo-manufactured components as I could. If you decide to replace the entire shell, you might find you need to unplug a couple more plugs, and you’ll have to deal with putting the ZL springs back together, which commenters say is the trickiest part of reassembly.
When I took out the middle panel, I put some masking tape around the end to hold the ZL trigger in-place while I moved it about. I didn’t want to have to realign those springs if I accidentally knocked it out of place.
I also wouldn’t recommend opening and closing the little plug releases with metal forceps. Rather, use a toothpick or something plastic. Metal may scratch the delicate circuitry if you slip.
4) Cut the angle supports off the Saturn actuator shaft
The shaft (the white bit which the Saturn D-pad sticks into), has little ‘struts’ attaching it to the circular part of the base, for structural support.
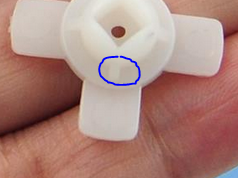 Cut away these little angle supports
Cut those away with your razor blade so that the shaft is a perfectly round cylinder. To be clear, I am NOT talking about the base itself or the cross part. You need the base and cross part to stay attached.
 After
After5) Drill a hole in the BASSTOP D-pad
This is the most delicate part of the project, because if you get the hole off-centre or break the D-pad, it’s back to Amazon.
The idea is for the actuator shaft to be able to fit up through the centre of the BASSTOP D-pad from underneath. There’s a bit more shaping to do before that will be possible, but you’ll be able to test the size of the hole you drill by inserting the actuator shaft from the top.
It’s really important that the hole is right in the centre on the D-pad, because otherwise the Saturn D-pad will end up misaligned and the thumb pressure required for different directions may be uneven. To help with this, start with a smaller hole. There’s a little square/rectangle of structural plastic on the underside of the BASSTOP D-pad, right in the centre. If you select a drill bit which just fits inside that square, then the square can act as a guide to get the initial hole right in the centre. From memory this was about a 3 mm drill bit, but I didn’t record the exact diameter. If there’s a line of structural plastic in the middle of that square, carefully tear it out with your pliers and/or cut it away with your razor so that the drill bit can centre up easily.
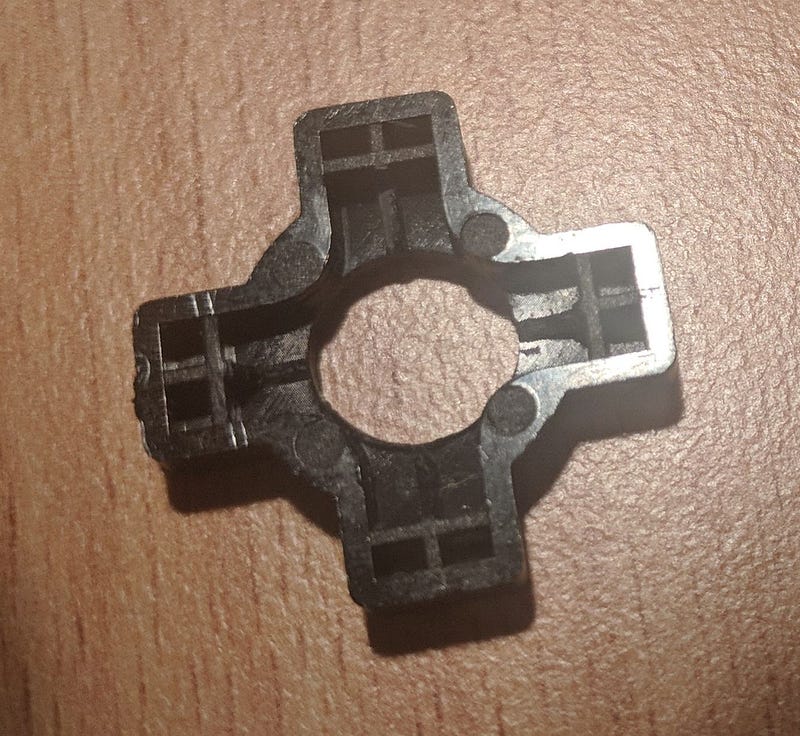
 BASSTOP D-Pad after the first guide hole is drilled
My finished hole needed to be either 8 or 8.5 mm. I’m sorry I didn’t write it down, but there’s no guarantee your actuator is moulded exactly the same as mine, and regardless it’s helpful to drill progressively bigger holes, going up about a half a millimetre at a time. This will apply minimal torque to the D-pad, so it doesn’t need quite so much grip to hold it still. I recommend very carefully gripping the D-pad in your vice to keep it still while you drill. Line the inside of your vice with a cloth to improve the grip and soften the pressure applied to the D-pad. What worked best for me is positioning the cross pad on an angle, so that it was gripped by all four directions, i.e. like this: |×|, not this: |+|. Getting the grip just tight enough to hold the D-pad still while you drill, and yet not enough to break it as the hole gets bigger and the D-pad gets structurally weaker, is the trickiest part of this project. Take great care when winding that vice, the pressure it applies is extreme!
 Finished hole
After each drill, test the hole size. Make sure you first remove the plastic shavings and file away any excess plastic with your nail file. Ideally it will take some light pressure to fit the shaft in, but not so much pressure that you risk breaking the drilled D-pad when you squeeze.
6) Remove some specific pieces of the BASSTOP D-pad’s structural plastic
We only want to keep the “T” of structural plastic at each direction/end of the D-pad underside.
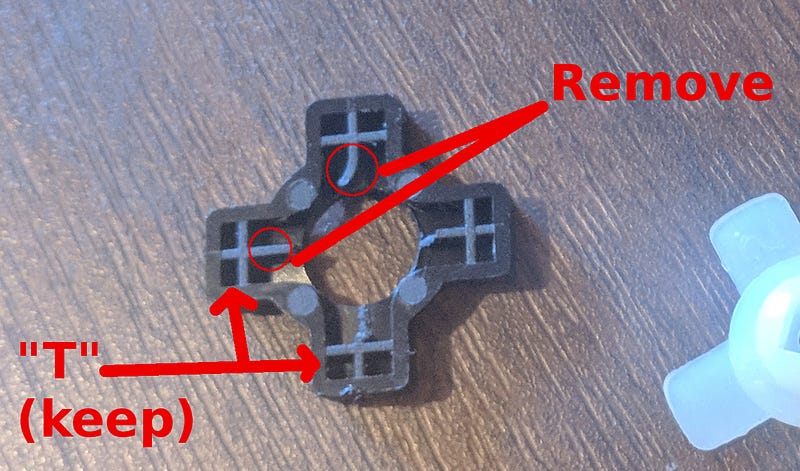
By the time you’re done drilling, some of this may already have broken off, but use your razor blade and/or pliers to clear out what remains, so it ends up looking like this:
Don’t remove the T’s, because they may play an important part in actually pressing the switches.
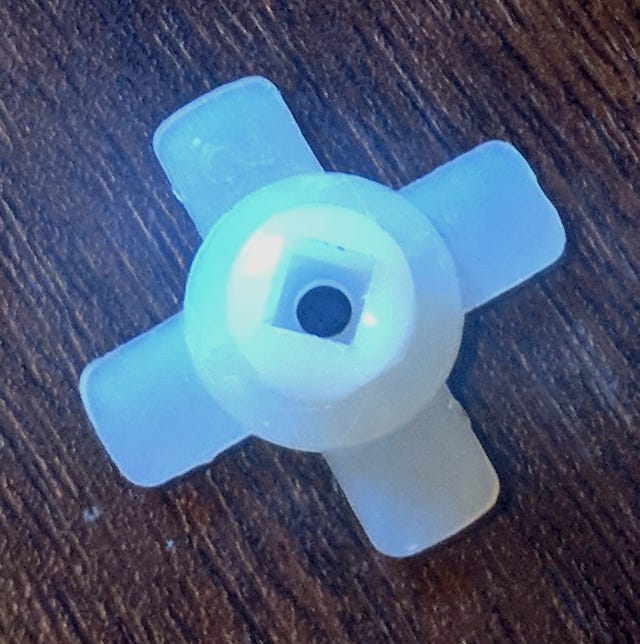
7) Trim the cross part of the Saturn actuator
Use your razor blade to trim the base of the Saturn actuator until it fits snugly inside the underside of the BASSTOP D-pad.
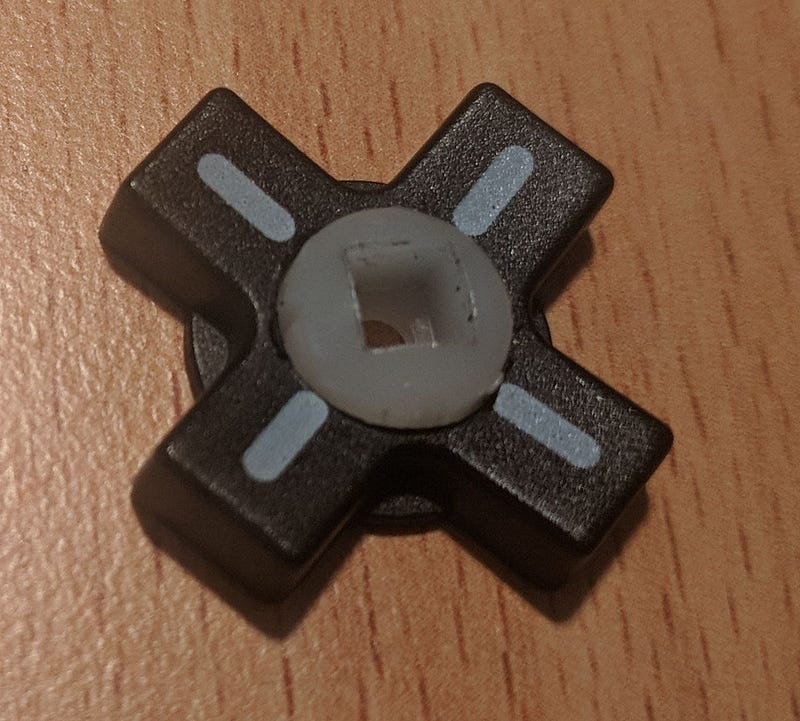
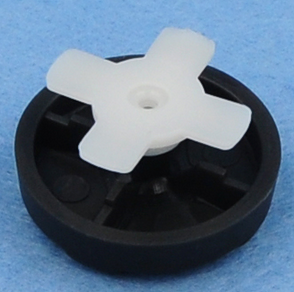
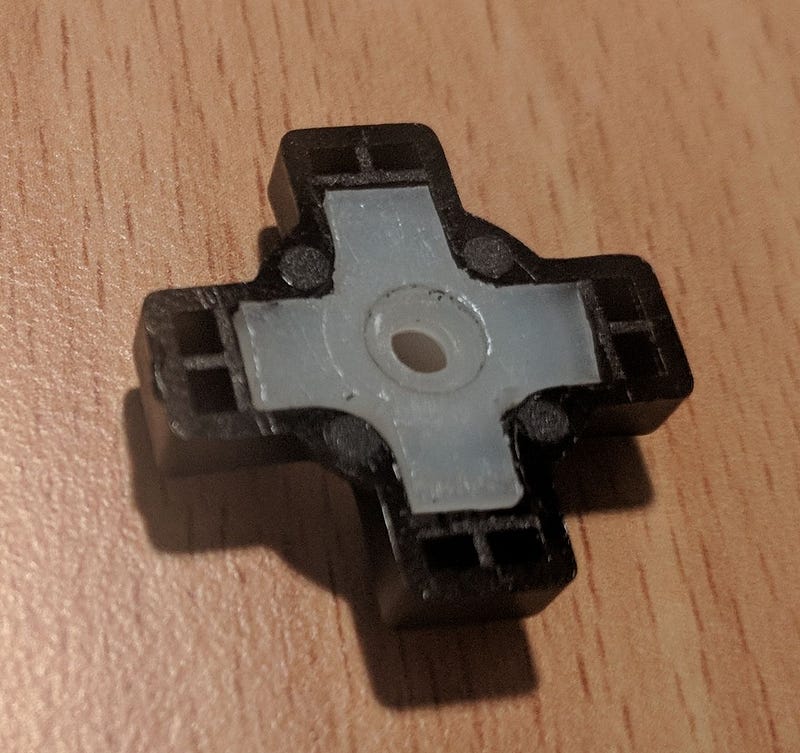 The fully shaped Saturn actuator fitting into the BASSTOP D-pad
You want to be able to slot the actuator shaft up through the hole in the BASSTOP D-pad from underneath and have the actuator cross part settle in flush with the remaining structural plastic. You’ll end up cutting away some of the ends and edges of the cross part as well as some of the thicker circular part of the actuator base.
 The fully shaped Saturn actuator, top and bottom
Try to shave the ends and sides off the actuator evenly. Ideally it will take a bit of pressure to get the actuator cross part to press into place, so it fits nice and tight. On the other hand, it’s vital that the actuator doesn’t try to pop back out, or it will mess with the next step, and ultimately result in uneven press pressure. Be patient and shave off just a tiny sliver at a time.
Remember — you can always shave more off, but you can never put it back if you go too far.
Eventually, mine ‘snapped’ into place satisfyingly.
8) Glue the Saturn actuator into the BASSTOP D-Pad
Use the wooden end of a matchstick to smear a touch of superglue into the flat underside of the D-Pad near each of the T’s, then quickly press the actuator into place.
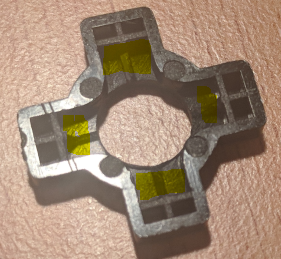 Glue where you see the yellow highlight
If you did the last step well, the actuator will stay in place by itself while you leave it to dry for 15 minutes.
You only need a tiny, paper-thin smear of glue or less. Don’t use blobs of glue, or the excess will squeeze out and create bulges in places which may interfere with the precise fit which this component is intended to have in the Joy-Con.
The glue is not really structural, because:
- The hybrid actuator will be sandwiched pretty snugly inside the Joy-Con.
- The main lever strength when you move the D-pad will come from the actuator shaft.
- A later step will ensure the Saturn actuator does not need to ‘pull’ down the BASSTOP cross pad to get it to do it’s part in pressing the switches.
The glue is there as a paranoia measure to reduce the possibility of any transverse wiggle in the hybrid actuator and to guarantee it doesn’t fall apart during reassembly of the Joy-Con.
9) Reassemble the Joy-Con with the Hybrid Actuator
Back to the video for this since it shows reassembly.
It actually just shows a different colour shell being put on, with the standard 4 buttons (not the cross pad like our product), but the only difference is you will be placing the cross-pad when the video shows placing the buttons. Don’t accidentally skip to the wrong part of the video, because the same video contains footage of a right Joy-Con dis/reassembly.
I suggesting watching ahead a couple of steps for each step you do, because looking ahead can prevent you working yourself into a corner and having to backtrack.
Make sure you put the battery in the right way up. The video shows the battery being put in the wrong way up, and then it skips a few frames and just for an instant you’ll see the battery wire has changed place so that it uses the little gap in the bracket which allows the wire through.
You now have yourself a Joy-Con with a Saturn actuator shaft. Nice one!
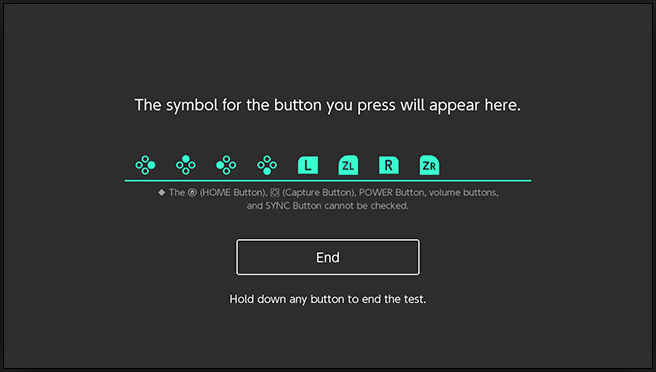
10) Test
Turn on your Switch and play around with all the buttons. Try it in attached mode and wireless mode. Don’t forget the little SL and SR buttons.
There’s a screen somewhere in settings that might come in handy as it lets you test most of the buttons.
If anything doesn’t work right, you’re going to have to open it back up and adjust something. The comments in the Youtube video might help. You’re on your own for this. I wish you luck!
11) Shorten the Saturn D-pad pillar
If you insert the Saturn D-pad now, you’ll notice that it stands out quite far from the Joy-Con and the supports around underneath don’t touch down on the BASSTOP D-Pad.
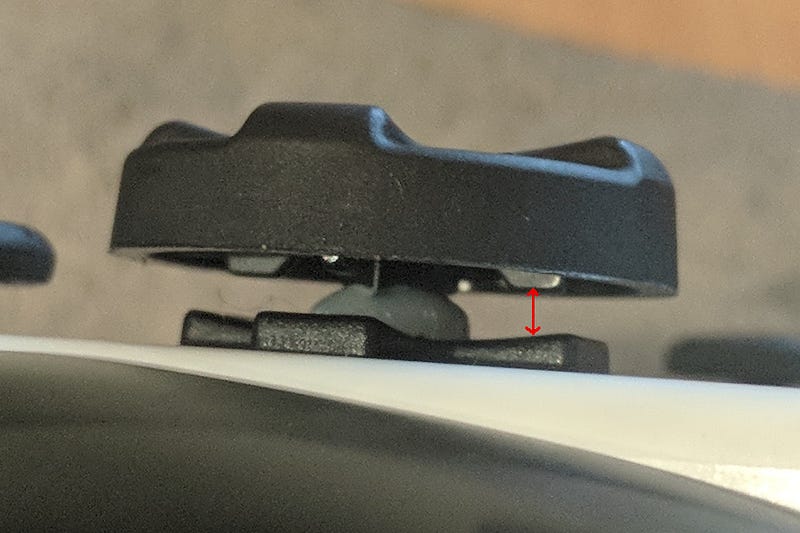
You want those supports to rest on the BASSTOP D-Pad, because it will prevent bending of the pillar and over-stressing of the actuator shaft. It may also help ensure the BASSTOP D-pad plays it’s part in depressing the switches without pulling away from the Saturn actuator. I think the ends of the Saturn actuator cross part are probably over the switches enough to click them in by itself anyway, but better safe than sorry.
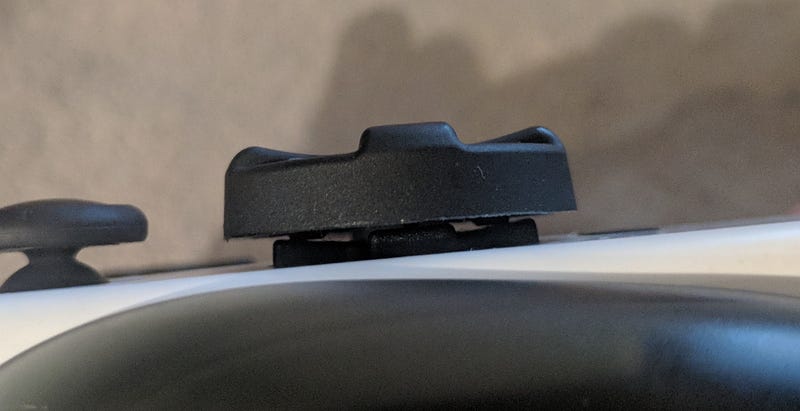 After trimming
To achieve this, use your razor blade to slice a small, even sliver off the end of the Saturn D-pad pillar and reinsert the D-pad. Press it down nice and firmly until it doesn’t go in any more, and then check whether the supports are touching down yet. Repeat this until the supports rest on the D-pad for all four directions.
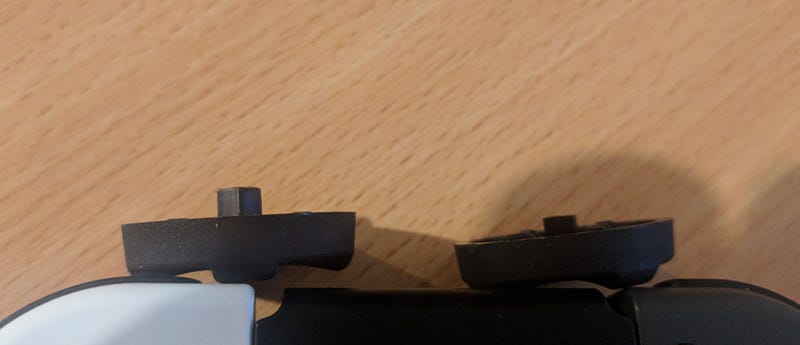 Before and after
It’s important to make sure the end of the pillar is sliced nice and flat to eliminate any tilt. A bit of filing with your nail file can help with this if you make an uneven cut.
Don’t trim off a millimetre more than necessary. It’s important that the D-Pad still goes down into the shaft as deeply as possible, because that’s what holds the D-pad in and gives it structural strength when using it.
As before, remember that you can always take more off, but you can’t put any back on. Trim, test and repeat, and slow and steady wins the race.
Play
Congratulations!
Now go do some pixel-perfect platforming and mega-consistent dragon punching.
Please comment with pictures of your successful mod, I’d love to see it!
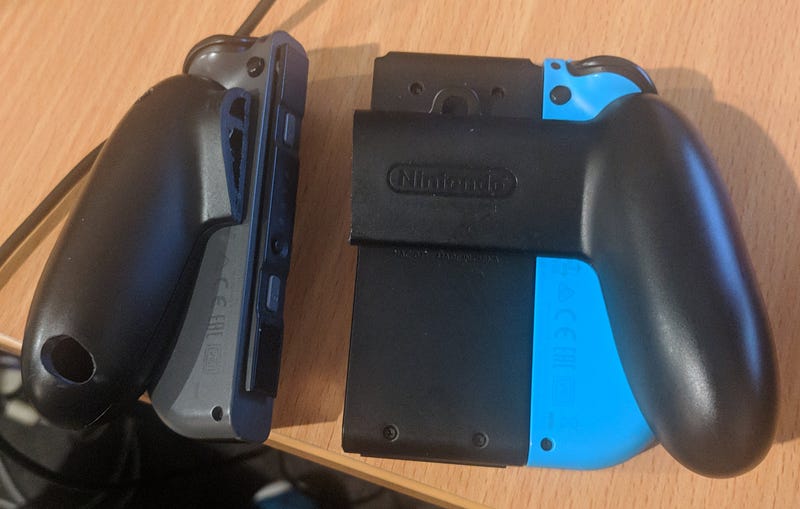
EDIT / Grip update:
I recommend the tallest Skull & Co joystick thumb grip on the left Joy-Con, to make it easier to use the joystick without accidentally touching the quite pronounced D-Pad.
The ultimate grip companion, for me, turned out to be the Gametech Separate Charging Grip. It needed some butchering to stop the casing from impeding the D-pad, which doesn’t look pretty, but aesthetic plays a definite second to comfort and functionality for me.
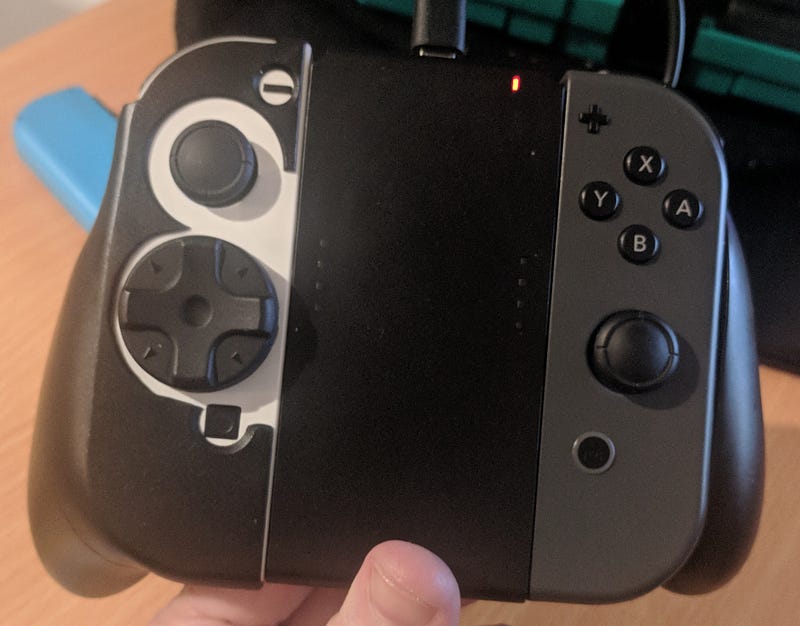

The Gametech grip has a lower handle, which makes it much more comfortable to use the D-pad as a primary control. As a bonus, it secures independently to the Joy-Con, so you can attach and detach the Joy-Con from the console without take the grip on and off.
I found the Gametech grip a bit too low for the right-hand side (since you’re using the upper buttons on that side), so I opted to use a standard Nintendo Joy-Con grip for the right-hand side. To achieve this while retaining the ability to use the right grip in hand-held mode, I cut a Nintendo grip apart and bolted a right Joy-Con to the grip with tiny nuts and bolts.
 The big hole you see in the back of the right grip was to allow me to do up the last screw in the Joy-Con shell. It was unnecessary, and if I’d been a bit smarter with the screws/nuts/bolts arrangement, I could have avoided it. My fingers don’t touch that area of the grip, though, so I’m happy.
So, it’s a lopsided setup, but very comfortable, and it works in all modes. You can even dock the Switch with the modified Joy-Con attached (as long as you don’t have any USB devices plugged in the side)!